MADE MOSTLY FROM SCRAP FABRIC
Please Subscribe to our YouTube channel for more content!
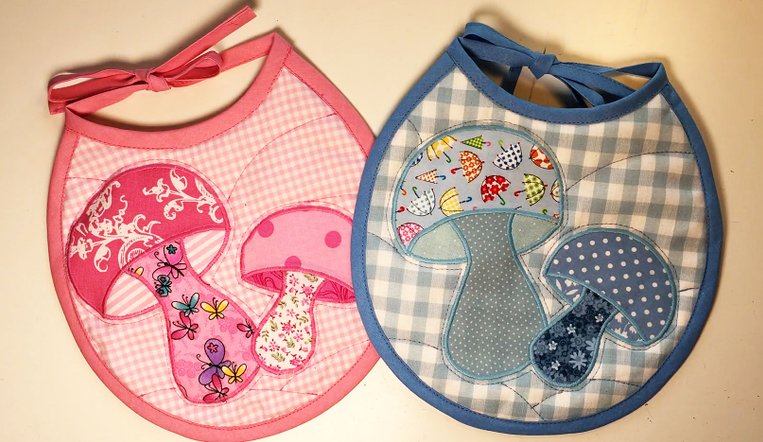
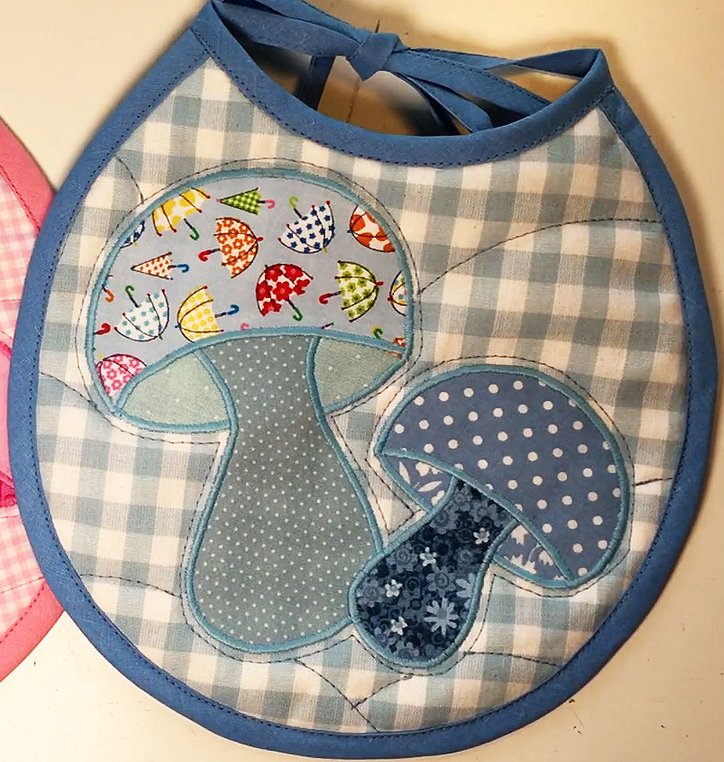
These cute appliqué baby bibs are the perfect gift for that baby shower, as a Christening present or for the child’s first birthday. Easy to make as a weekend project and with the benefit of using up some of your scrap fabric ... and ... Christmas is coming soon!
You can follow along with the how-to video on our YouTube channel: LINK
Download the free pattern in A4 format here: LINK
Download the free pattern in Letter format here: LINK
If you would like to showcase your version of this appliqué baby bib on the Surmulerum
website, send a photo of your finished bib together with your name (first name only is fine) and your country/state. We will then add it to the Appliqué Baby Bibs Showcase Gallery.
Send your file to lise@surmulerum.com
You will need some wadding. I use this 50/50 cotton - bamboo blend. It is really soft. It is naturally antibacterial and it holds up well even after many times in the washing machine.
You will also need some double-sided fusible sheet, mine is Bondaweb from Vlieseline but any similar product will do. There is a glue layer carried on parchment paper on which you can draw the pattern.
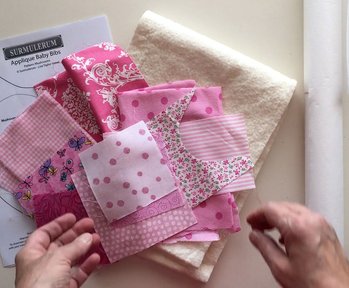
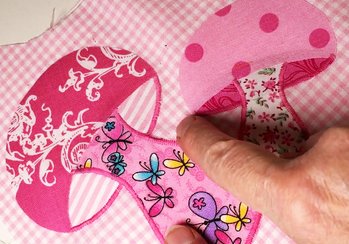
Then of-cause you need some fabric. Two pieces need to be large enough for the front and back of the bib, the rest can be smaller scraps. I usually sort my scraps into piles of similar colours, so I can mix and match pieces that suit each-other.
Layer the back fabric, the wadding and the front fabric and cut out the basic bib shape.
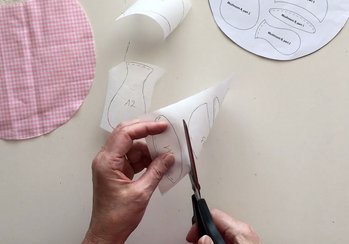
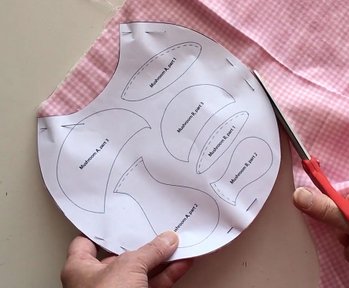
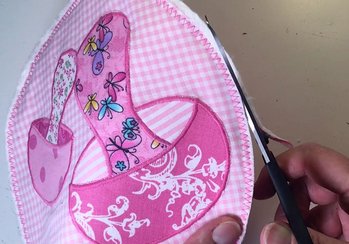
Roughly cut around each shape well outside of the lines.
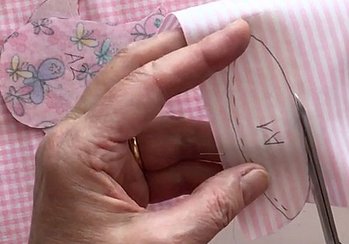
Then cut out each piece to the line.
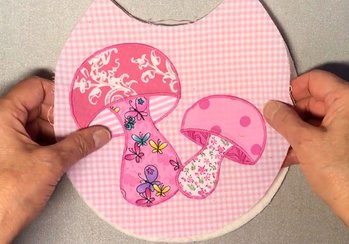
You may have to move them around a bit until you are happy with how it looks. Be careful not to go too close to the edges as you will need space for bias binding later.
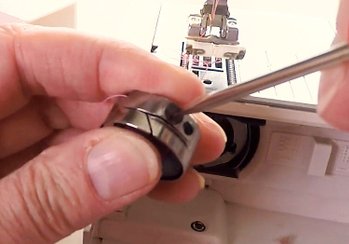
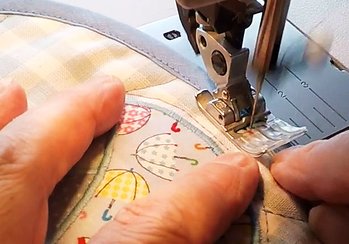
Now we need to set up the sewing machine for silk-stitching. Try it out on the test piece first, I set my machine to zigzag, 2.5 mm wide and 0.35 long ... I changed that to 0.30 at the end of the set-up.
I loosened the top tension in several steps.
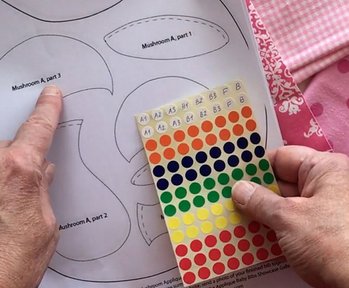
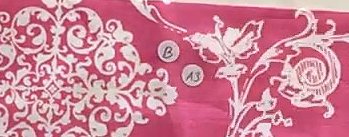
I usually make labels naming each part of the pattern as in A3 for the large mushroom head, A1 for the middle bit, A2 for the stem and the same but with B for the other mushroom. I label the front fabric F and back with a B.
I also change my mind and replace some of the stickers as I find a better solution.
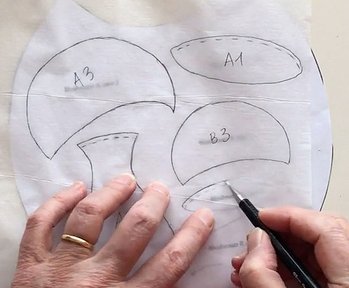
Place the fusible Bondaweb paper on top of the pattern and trace each shape onto the parchment side of the paper. Mark each shape with its code, A1, A2, A3 and so on, so that you know which is which.
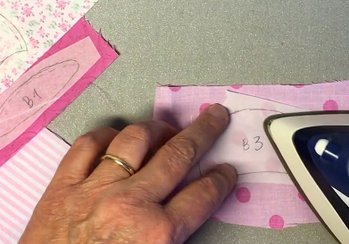
Now place the cut-out Bondaweb on the wrong side of the fabric, matching up the numbers on the paper pieces with the stickers on the fabric.
Then iron each pattern onto the wrong side of the fabric, glue side down - paper side up.
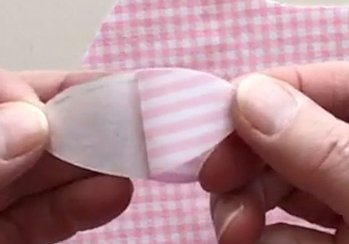
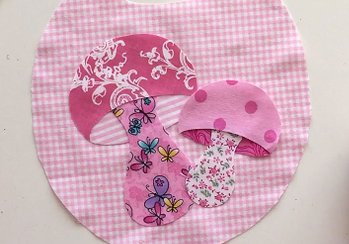
Peel the parchment paper off each piece and place it on the front base fabric.
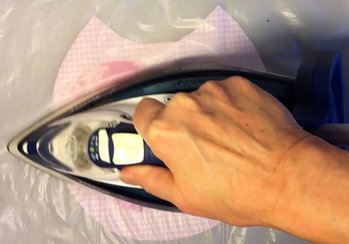
Then bring it to your ironing board and iron it on with a pressing sheet in between. I have this silicon pressing sheet, but you can also use a thin piece of cloth or tea-towel.
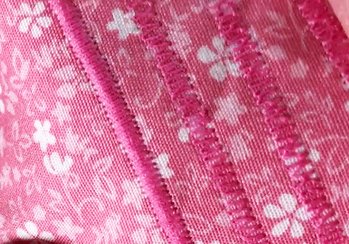
I was aiming for the bottom thread to pull the top thread onto the wrong side, but it was not enough, so I had to tighten the bobbin-holder to make that happen.
After I did that, I got the perfect silk stitch on my sixth trial.
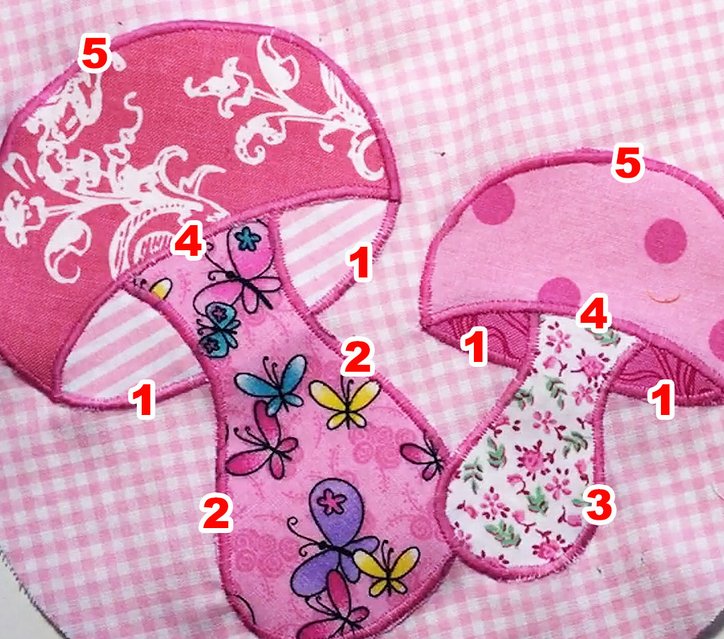
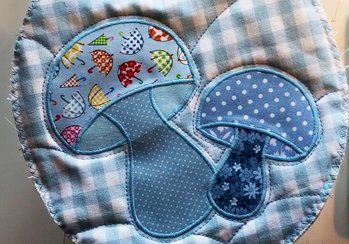
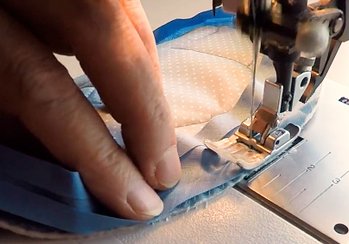
It is important in which order you sew it. Anything that is in the back to be sewn first. So, first the back underside of the mushroom heads ... then the stems ... then the bottom front of the heads and finally the top of the mushrooms. Try to have the stitching close to but still covering the edge of the shapes, so that there are no raw edges.
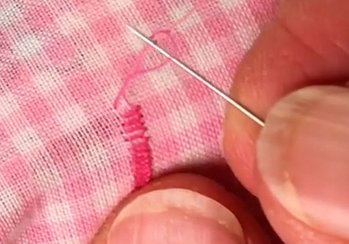
After each row of stitches, use a pin to pull the upper thread through to the wrong side. When pulling slightly on the lower thread, you can pull up a loop of the upper thread ...

This can be a bit fiddly, but it ensures that the stitching holds up in the long run, even after many times in the washing machine, so it is well worth the effort.
Iron the bib from the back and layer it. First the back piece, then the wadding and finally your beautiful application piece.
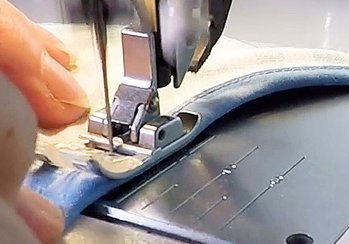
Now, zigzag all around the edges making sure all the layers line up. Trim back any wadding that sticks out.
Then just a few lines on the surrounding area to divide larger pockets.
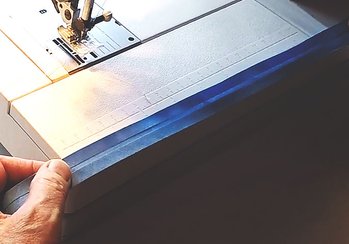
Fold the bias binding over on the right side and sew the top stitch about one mm from the edge of the bias binding.
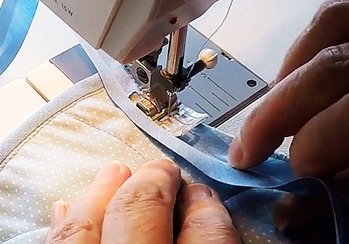
Again, open the bias binding, line up the edge on the back of the bib, and sew in the fold along the neckline. Cut the other end of the tie at the same length.
Sew the top-stitch on the very beginning of the folded bias binding on the left side of the bib, seeing it from the front.
Then continue all the way to the bib itself, continue across the neck-line and out onto the other string to the end where you have pinned it.
... then grab it with a pin and pull it through and bind the two threads together with two knots.
Continue with the other seams, making sure to tie them up as you go.

Pin it all the way around. I am making both a pink and a blue version here.

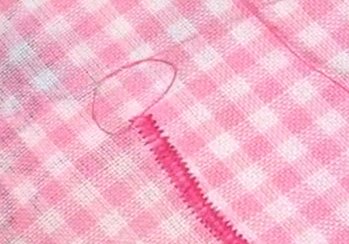
For the quilting, it does not need much. I sew all around the motif about 2mm out.
Open the bias binding, line up the edge on the backside and sew in the fold all the way around the outside.
For the neck-tie, measure about 20 cm (8 inches) of bias binding and start sewing on the neckpiece at that point.
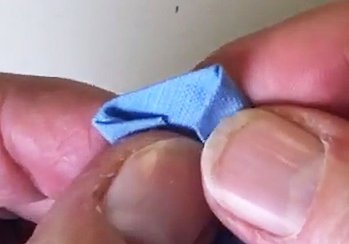
On the right band first, fold the end over, then angle the very end and fold it in, so that there is nothing sticking out. Pin it and do the same at the other end.
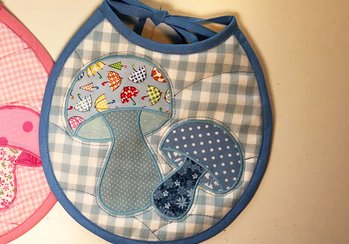
Now the bib is finished - wrap it in some pretty paper and bring it to that Baby-Shower.
You can follow along with the how-to video on our YouTube channel: LINK
Download the free pattern here: LINK
If you would like to showcase your version of this appliqué baby bib on the Surmulerum
website, send a photo of your finished bib together with your name (first name only is fine) and your country/state. We will then add it to the Appliqué Baby Bibs Showcase Gallery.
Send your file to lise@surmulerum.com
LEAVE A COMMENT, QUESTION OR SUGGESTION:
RELATED PROJECTS:
SEWING PROJECTS, ALPHABETICAL: